PopUp4U came about because a client asked to have one on their Joomla! website to promote a fundraising event they were hosting. Simple enough, head over to the Joomla Extension Directory (JED) and grab one. Not so fast! Since this client is on a tight budget, the only 'good' popup model boxes were commercial and way too expensive (IMHO) just to display a model box on page loads! I quickey tossed together some basic code using Fancybox 2 (my favorite lightbox app) and got my client up and page-popping in an hour of their initial request.
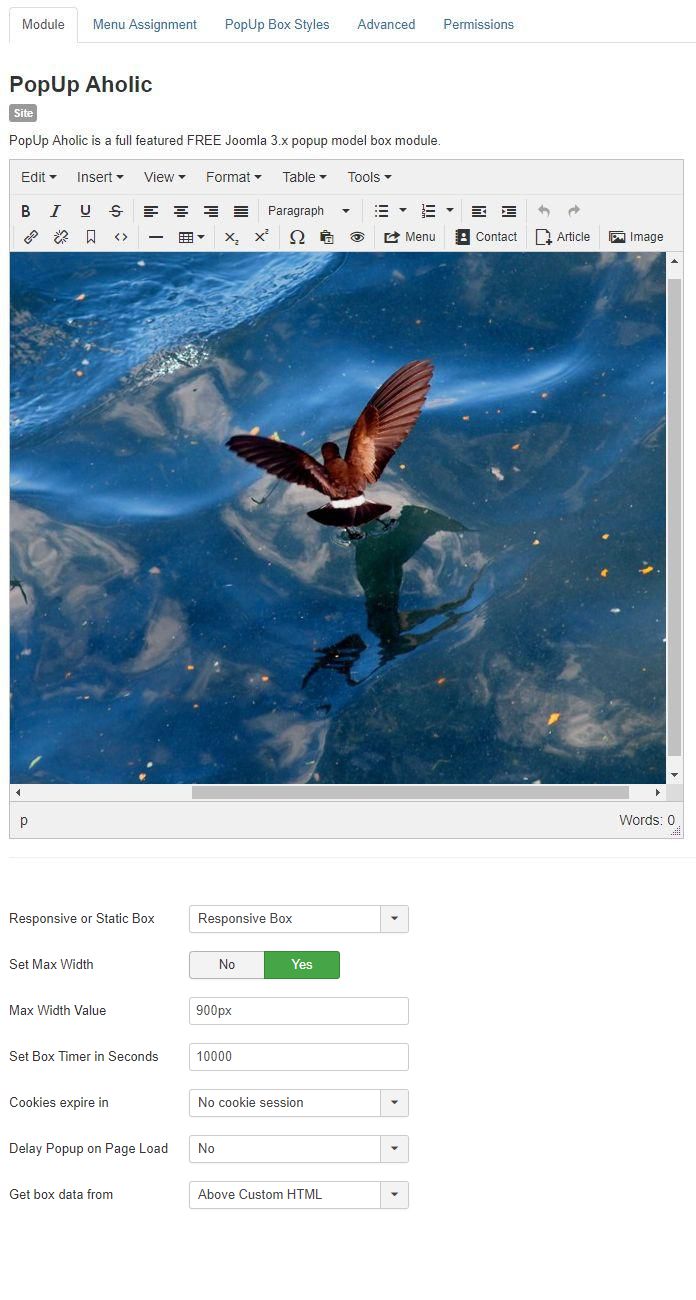
Module Tab:
First you'll be greated with your default Joomla! editor. Here is where you enter in everything you need for your popup box. Once completed, there are option below to customize how your popup box will behave.
Options:
- Responsive or Static Box: Choosing 'Responsive Box' will allow your popup box to fit into any screen size (desktop, laptop, tablet or smartphone). Selecting 'Static Box' will bring up Width & Height options that you can set to your popup box needs.
- Set Max Width: No/Yes option. If you select No, the Responsive popup box will span across the total left/right of your viewpoint. If you select Yes, a new option will display
- Max Width Value: Set this pixel value to limit the Responsive width of your popup box. Please note: your value MUST include 'px'. Example: 900px
- Set Box Timer: Adjust this setting to pre-select how long the popup box will show on page load. The higher the value the longer the popup box will stay active.
- Cookie expires in: No Cookie Session, Day(s), Hour(s), Minute(s). Adjust this option to your specific needs.
- Set Cookie Time: If above option is set to Day(s), Hour(s) or Minute(s) this option box will display. Here you enter a time value based on your selection above.
- Delay Popup on Page Load: If No, your popup box will 'popup' once the entire page finishes loading. If Yes, a new option box will show allowing you to set how long of a delay there will be before 'popping' up.
- Get box data from: The 'Above Custom HTML' will render everything you entered into the editor. Selecting 'External file' will allow you to import an external HTML file from your server path (or any other server path), embed a video from YouTube, a Google map, etc. to use in your popup box.
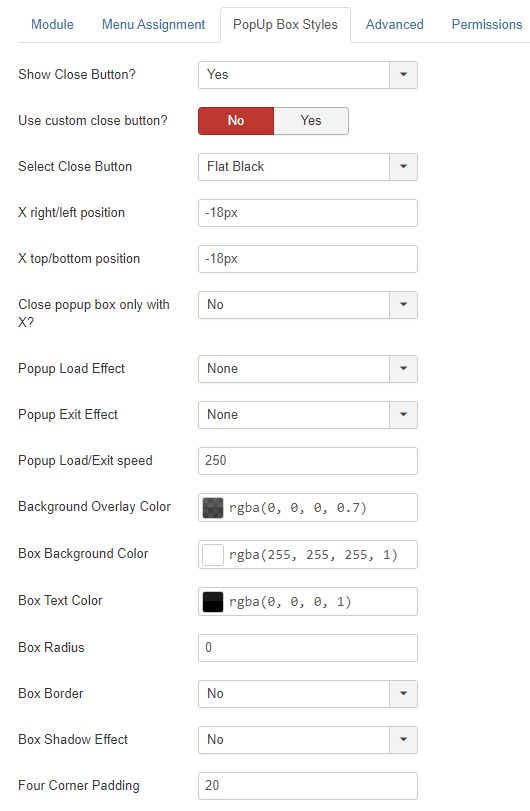
PopUp4U Styles Tab:
- Show close button: Default is Yes. If No, the close button won't show and the popup can't close until it times out.
- Use custon close button?: No/Yes option. If No, you can select what Close Button color icon to use.
- Select Close Button: Select what Close Button icon you wish to use.
- X right/left position: Adjusting this value will allow you to move the Close Button to right/left.
- X top/bottom position: Adjusting this value will allow you to move the Close Button to top/bottom
If you selected the Yes option of Use custom close button, three new options will appear (URL to custom close button, Custom close button width & Custon close button height).
- URL to custom close button: Enter in the ABSOLUTE path to your custom button. Example: https://YOUR_DOMAIN.COM/YOUR/PATH/IMAGE_FILENAME.png
- Custom close button width: Enter the width value of your custom close button. Value MUST include 'px'. Example: 36px
- Custom close button height: Enter the height value of your custom close button. Value MUST include 'px'. Example: 36px
- Close popup box only with X: Default is No. If Yes, popup can only be closed using the 'X' graphic while active.
- Popup Load Effect: Choose between None, Fade or Elastic.
- Popup Exit Effect: Choose between None, Fade or Elastic.
- Background Overlay Color: Choose your popup box overlay color.
- Box Background Color: Choose your popup box background color.
- Box Text Color: Choose your popup box text color.
- Box Radius: Adjust to create rounded corners of your popup box.
- Box Border: Yes/No to have a box border effect.
- Border Thickness: Enter your border thickness value.
- Border Color: Choose your border color & opacity.
- Border Type: Choose between Solid, Dotted, Dashed, Double, Groved, Ridge, Inset or Outset.
- Box Shadow Effect: Yes/No to have a shadow effect around your popup box.
- Box Shadow Color: Choose your box shadow effect & opacity.
- Four Corner Padding: Adjust to increase/decrease the amount of padding your data will have inside your popup box.
Advanced Tab:
- Load script files inline?: Default is No. If Yes, supporting script files will be loaded in the <body> tag of your assigned page. If you need to change this setting to Yes, the added option below will show.
BUILDING AN ACTION 'CLOSE' BUTTON:
You can now build into your popup an action 'Close' button to replace the top right 'X' icon. This will force your users to click onto this button to close the popup and gain access to the site. To build an action 'Close' button, place this code into the popup editor source code;
<a class="btn fancy-closeBTN" href="#">CLOSE</a>
Once this code has been inserted and styled to your needs you'll want to make a few additional module setting adjustments. Set the option 'Set Box Timer in Seconds' to a very high value (e.g. 1000000). Set 'Cookies expire in' to No cookie session. Now, click into the 'PopUp Box Styles' tab and set the 'Show Close Button?' to No and 'Close popup box only with X?' to Yes. Save these settings and test PopUp4U. If everything was done as explained you'll now see a 'Close' action button within your popup.

If you are using an advanced Joomla editor (e.g. JCE) the process to create a 'Close' button is a lot easier. Type in the close text you wish to use within PopUp4U's editor box and hi-light this text. Click the 'Insert/Edit link' icon and in the URL enter the pound symbol (#). Click onto the 'Advanced' tab and in the 'Classes' box enter,
btn fancy-closeBTN
Click the JCE blue 'Insert' button and finish designing your PopUp4U popup box. You can add any additional action hyperlink within your popup (this feature has always been available within PopUp4U) as you need.
PLEASE NOTE:
PopUp4U has been tested and works in all 'active' module positions. For extensions like PopUp4U we have found that the 'debug' position works best PROVIDING the template you are using supports this module position. When selecting how to use PopUp4U, it is strongly suggested that you turn off the Show Title module option. Also, if you want to engage your site clients and not run them off... use the 'Cookie' timer option!